For thousands of years, herbs have been used in food preparation and for medicinal purposes. How did those ancient herb enthusiasts preserve their herbs? They dried them. Drying is the best method for preserving most herbs to retain their flavor and medicinal properties for future use. Whether preserving a bumper crop of oregano or the latest farmers’ market haul, drying herbs remains one of the simplest methods.
Why should you dry herbs?
Drying herbs may seem like more effort than necessary. After all, can’t you buy a 2-ounce jar of Italian blend for a dollar? Yes, but most grocery store dried herbs have been sitting in bottles for several months. While drying extends the shelf life of herbs, the longer they sit, the more their flavor fades.
Consider that dollar jar of Italian blend. Although it costs only 50 cents per ounce, this price is significantly higher than if you dried the herbs yourself, especially since you can make much more than 2 ounces with just a handful of fresh herbs. Drying herbs at home will provide you with more potent ingredients for cooking and save you money.
Best herbs for drying
Although most herbs can be dried, some dry better than others. Woody herbs, such as rosemary and thyme, dry extremely well. Additionally, herbs with fleshier leaves, like marjoram, sage, and oregano, also dry reasonably well. While larger, fleshier herbs like basil, mint, and parsley can be dried for preservation, they do not retain as much of their flavor.
Regardless of the herbs you choose to dry, the method you use and the quality of the fresh herbs significantly impact how well they retain their flavor.
Selecting the right herbs
When harvesting herbs from your home garden, the best time to pick them is in the morning, after the dew has evaporated. Harvest herbs before they set flowers or just as the flower buds are about to open. Picking them before flowering ensures continual leaf production, while harvesting right before flowering results in more intense flavor.
If purchasing herbs, choose those with vibrant leaves, free from bruising or damage. To prepare herbs for drying, wash them in cool water and gently shake off excess moisture. A salad spinner is an excellent tool for this! It’s important to remove all moisture from the leaves before drying to prevent mold.
Methods for drying
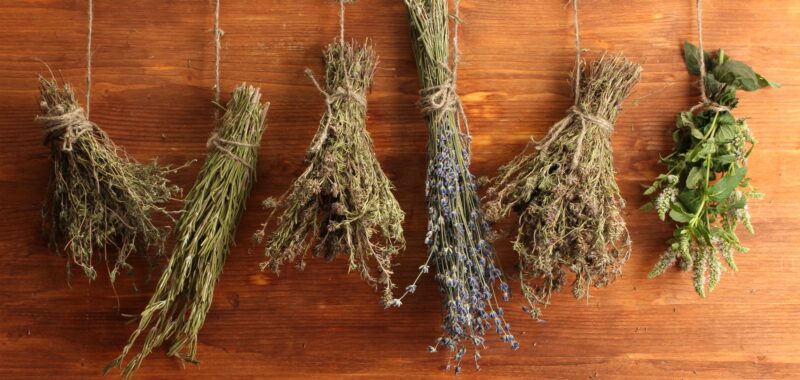
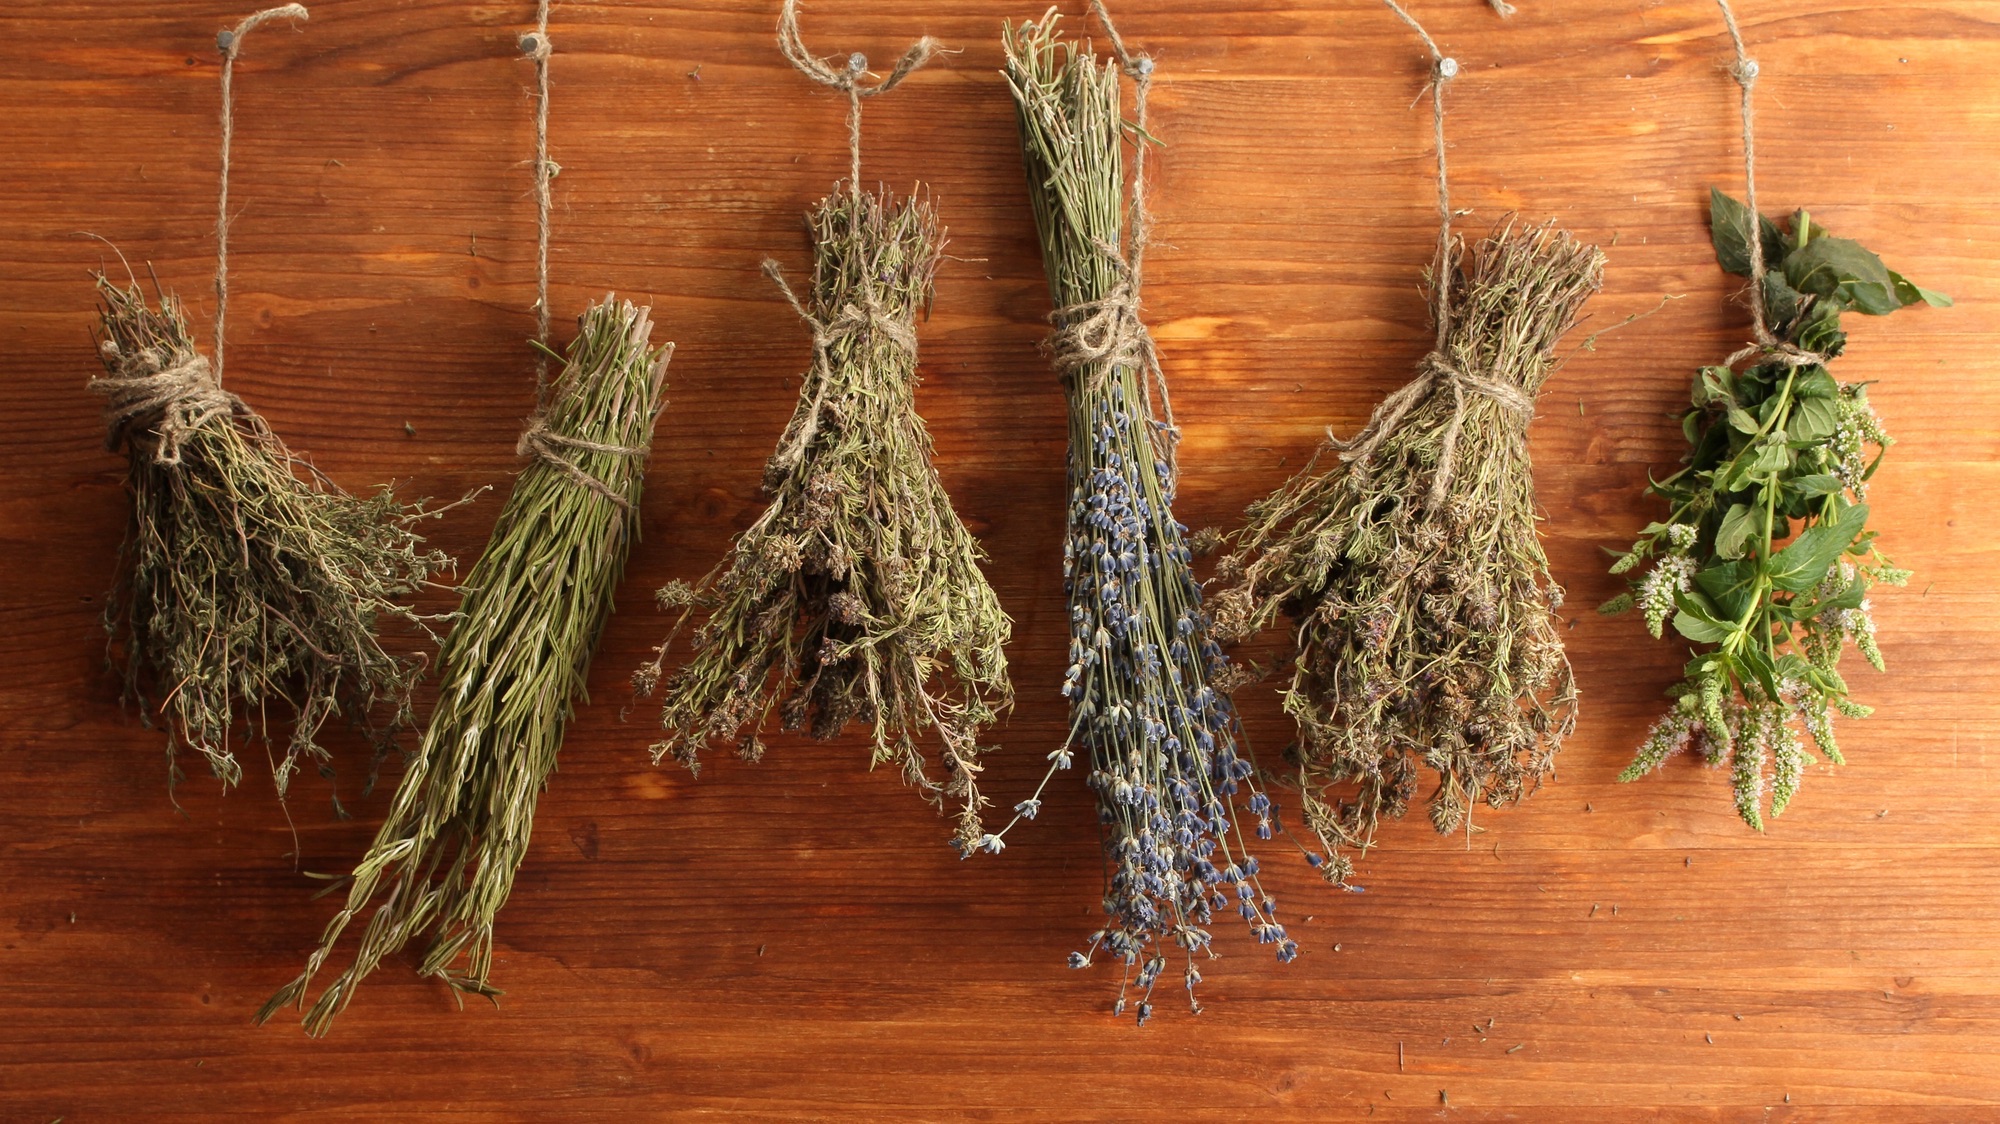
Air drying
Air drying is the simplest method for preserving herbs and requires no special materials or equipment. Begin by gathering clean, dry herbs into small bundles, aiming for five to ten stems per bundle. Bundles that are too large may prevent proper air circulation, increasing drying time and the risk of mold growth. Secure the stems with a rubber band or twine. Once bundled, hang the herbs by the stems in a cool, dry, and dark place until they are dry and crumbly. If you live in a humid area, consider placing a fan on a low setting to help improve air circulation.
To keep dust off your herbs while they dry, you can cover them with a paper bag that has holes punched in it for ventilation. Use a paper lunch bag and a hole punch to create several holes all over the bag. Insert the herb bundle into the bag, leaving the stems exposed. Then, use the rubber band or twine to secure the bag around the stems, and hang the bundle as usual.
Oven Drying
You can use your oven at a low temperature to dehydrate herbs more quickly.
Preheat your oven to the lowest temperature possible, typically around 170°F to 200°F. Wash and thoroughly dry the herbs. Remove the leaves from the stems and place them in a single layer on a baking sheet. Position the sheet on the middle rack of the oven and allow the herbs to dry for 1 to 2 hours, checking occasionally to ensure they do not burn. The leaves are ready when they crumble easily to the touch.
Allow the herbs to cool to room temperature before storing. Although oven drying is a faster method, the heat can cause some loss of flavor and reduce the vibrancy of the herbs’ color. However, this method may be ideal for those living in humid areas.
Food dehydrator
A dehydrator is another effective way to dry herbs using low heat while providing air circulation to ensure even drying.
Place clean, dry herb leaves in a single layer on the dehydrator trays. Set the machine to a low heat setting, typically around 95°F to 115°F. Depending on the moisture content of the herbs, drying can take between 2 to 8 hours. Check on the herbs periodically to monitor progress.
Once the herbs are dry, allow them to cool to room temperature before storing them in an airtight container. Although using a dehydrator ensures consistent results with precise temperature control, purchasing one can be expensive and requires dedicated storage space.
Microwave Drying
Using a microwave to dry herbs is ideal for small batches because it is quick and easy.
Place clean, dry herb leaves between two paper towels on a microwave-safe plate. Microwave on high for 30 seconds, then check the dryness level. If the herbs are not fully dry, flip the leaves over and continue microwaving on high in 15- to 20-second intervals. Continue flipping the leaves between each interval until they become brittle. Similar to the oven method, the heat may cause some loss of flavor in the herbs.
Storing dried herbs
Storing dried herbs in airtight containers helps maintain their flavor and potency. Glass or plastic jars with tight-fitting lids work best to prevent exposure to air and moisture. Additionally, keeping your dried herbs in a cool, dark place (not above the stove) will help them retain their flavor, as heat and light can also degrade their potency.
Be sure to label the containers with the herb’s name and the date they were dried. Although properly dried herbs do not technically expire, they do lose potency over time. If the herbs begin to appear lighter in color or have a weaker aroma, it is time to replace them. You can compost the old herbs or use them in non-culinary applications, such as potpourri.
Using your dried herbs
Now that you have a fresh supply of dried herbs, using them is both satisfying and practical. If substituting dried herbs for fresh herbs in a recipe, you will only need to use about one-third the amount of dried herbs as you would fresh, since dried herbs are more concentrated.
If a recipe calls for fresh herbs and you do not have any on hand, you can rehydrate your dried herbs by soaking them in a small amount of warm water for 10 to 15 minutes before adding them to your dish. One of the best things about having your own collection of dried herbs is the ability to craft custom herb blends. Mix and match herbs to create a unique blend exclusive to your pantry. Homemade herb blends also make wonderful gifts.